01. Hello World! (Can you hear me?)
This is the simplest introduction to Syntalos, to get familiar with its interface and its modules.
1. Installing Syntalos
First, you need to install Syntalos. Syntalos only runs on Linux, but don’t be scared about that. If you are not already running it, Linux is easy to install on your DAQ computer, and can even be tested without any installation. For beginners, Ubuntu or Pop!_OS are solid choices in Linux distribution, for more skilled users Debian, Fedora or OpenSUSE are a good choice.
Then, you can just install Syntalos by searching for it in the App Store, or by following the installation instructions in case you can not find it there.
2. A first module
Upon first launching Syntalos, it opens with a blank window with fields for experiment details between an upper toolbar and a lower toolbar:
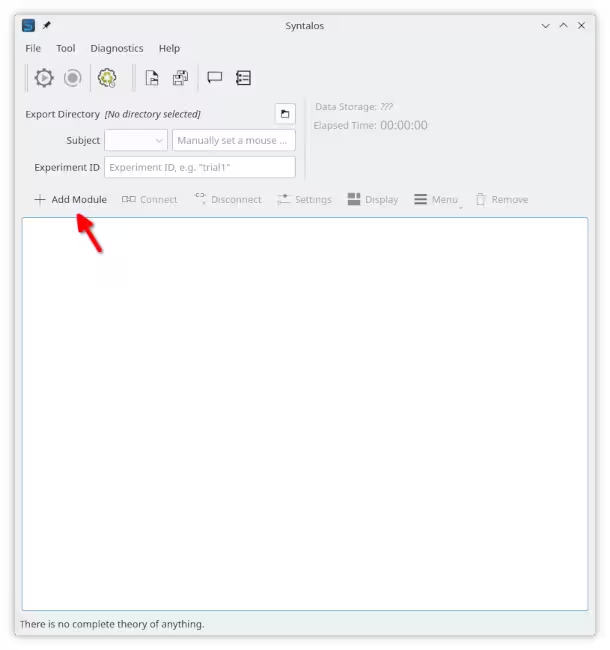
The upper toolbar contains settings affecting the whole application or its state, the middle experiment details concern the currently planned experiment run, and the lower toolbar is used to manipulate modules and change the experiment configuration.
Syntalos alone does not do much. In order to make it perform tasks, it needs modules. And modules need to be connected to form an experiment setup. Let’s add one by clicking the Add Module button in the lower toolbar!
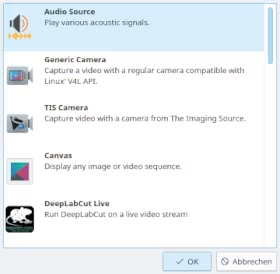
Select the Audio Source module and click OK, or just double-click on it. The module will appear on the white space, represented as a block.
3. Module Settings
Now that we have a module, we can manipulate it! Click on the module box. The module toolbar should now highlight a few buttons that were previously grayed out:
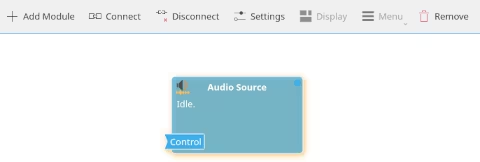
The Connect options are useful when you have multiple modules wired together - we are not there yet! A click on Remove will delete the module again.
Every module can display two kinds of windows: Settings windows and Display windows. Settings windows usually contain settings for the module that are saved with the Syntalos project files, while display windows usually either just display the module’s output or contain transient settings that are not saved and only affect the displayed output.
In our case, the Audio Source module has no display windows, so the Display button is disabled. It does however have settings, which we do want to inspect. Click on the Settings button, or double-click the module box!
In the settings of Audio Source, we just tick the box Start playback immediately for now.
4. Launch!
We are ready to run our configuration! We do not want to save any data that would be recorded though, so we hit the Ephemeral Run button:

You should now hear a sine wave of the selected frequency from your speakers! To stop the experiment run, hit the Stop button.
5. Relaunch! (With saved data)
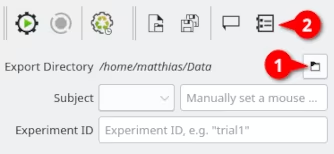
If we do want to save any data, we do need to set a location where it should be stored. Click on the Folder button in the Export Directory line, and select a path where your data should be stored (❶). You can then give your test subject a name, as well as name the experiment itself in the text fields below. If you want to, you can also have a look at per-project settings that influence data storage behavior, and allow you to create a list of test subjects to choose from, instead of having to type them in manually every time (❷).
After configuring this, the Play button in the top left corner of the main toolbar should now be enabled. If you click it, the experiment is run, and data is saved. Since we did not add any modules that actually generate data, all that will be saved is a bit of metadata about the current experiment run.
6. Saving the Project
Either click the Save button or select File → Save Project from the menu to save the current project with all its added modules, their settings and data storage location.
You will later be able to open it again via Open Project to resume your experiments.